healing cuisine logo

healing cuisine logo
Showing posts with label lunch. Show all posts

Tuesday, September 11, 2012

School Lunches Part 4: Healthy Recipes to Switch It Up

If you are just catching up, this is the fourth installment of our real food School Lunches series.  You can look back at Part 1: The Tools, Part 2: Nine Time Saving Tips, and Part 3: Menu Planning.  If you aren't already a follower of our Facebook page, you're missing out on some pretty great discussion and tips!  You'll want to click on over and join.  I welcome you to ask questions or share your natural living and real food cooking tips right on the wall to spark interest and discussion from everyone!

Now that you have all the tools and tips to prepare healthy whole food lunches in advance, saving you time and money, it's time to give you some fresh recipe ideas for packing school lunches.  Let's spice it up and keep your kid(s) engaged week after week!

SANDWICH BREAD ALTERNATIVES

We skip the bread all together in our house.  Instead, we use lettuce or kale wraps, turkey wraps, cucumber sandwiches, raw apple ring sandwiches, my almond flour tortillas, or these raw coconut wraps from Improveat.

*An important tip on lunch meat.
  You want to choose a Nitrite & Nitrate-free brand, also 100% free range or pastured turkey or chicken and 100% grass fed roast beef.  Ham is not included on the Core or Advanced Plans, and I recommend staying away from pork all together for many other health reasons.

Here are some ideas to go bread-free in the lunchbox:

-  Cucumber sandwiches or cucumber cups stuffed with salmon salad, chicken salad, or hummus

-  Cucumber sandwiches with sliced nitrite/nitrate-free turkey, raw cheese, and hummus

Make mini pizzas or cut homemade pizza into squares
-  Make mini pizzas using one of my grain-free pizza crust recipes, top with hummus or tomato sauce and roasted veggies

If you're anything like me, you stand by your classic chicken salad recipe.  Switch it up with chicken fruit salad (shredded chicken, segmented orange or grapefruit, sliced grapes, diced apple, diced pear, all tossed with homemade poppyseed dressing).  Serve in a lettuce wrap or over greens.

-  Cold turkey meatballs with cilantro-mint sauce served over greens or in a lettuce wrap.

Turkey wraps.  Now I know it sounds weird, but this combination is REALLY yummy.  Spread horseradish flavored hummus across free range deli cut turkey.  Lay down a lettuce leaf and a couple thin slices of cantaloupe.  Roll up and secure with a foodpick.

Black bean burgers are pretty good cold or room temp.  I like mine over lettuce with chipotle mayo.  Dave likes his sliced and wrapped in an Almond Flour Tortilla.

-  Grainless or sprouted grain waffles used as sandwich bread.  Slather with coconut butter, sunflower seed butter, unsweetened fruit preserves, organic cream cheese, apple butter, or apple sauce and make a sandwich!  Waffles can be made in advance and frozen.  Thaw in fridge overnight the day before you want to use them. 

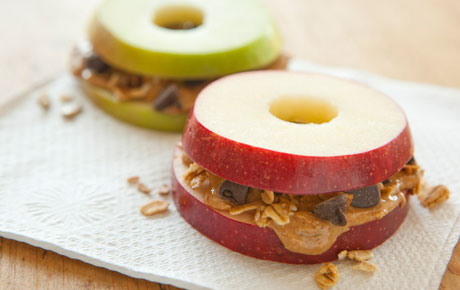
Kids love apple sandwiches!
-  Apple sandwich from cored sliced apple rounds filled with almond butter, sunflower butter, coconut butter, raw honey, and optional raisins/oats/nuts/seeds.

Grain-free chicken strips or nuggets with chipotle mayo, homemade ketchup, or honey mustard dipping sauce.

-  Quinoa packs a lot of protein in a small serving.  Make a quinoa salad.  Mix in a variety of veggies or meat/poultry/fish and keep it exciting.  Some of my favorite quinoa salad recipes include: Quinoa Apple Salad, Mediterranean Salmon-Quinoa Salad, Quinoa Veggie Salad.

-  Instead of tuna salad (because tuna is not recommended on the Advanced or Core Plans), opt for wild caught Alaskan salmon salad.  2 cups Alaskan salmon, 1 diced green pepper, 1 diced cucumber, 1/2 cup chopped onion, 1/4 cup fresh mayonnaise, 2-3 Tbsp fresh lemon juice, sea salt, pepper; mix it all together with a fork.  Roll in lettuce wraps or spread over top salad greens.

-  Banana Sandwich.  Raw almond or coconut butter and unsweetened raisins sandwiched between a banana sliced in half the long way.

NEW SIDE DISH IDEAS


-  Berries covered with coconut cream instead of yogurt (the cream is at the top of the can of coconut milk, the thick white part).  This works well in the winter using thawed frozen berries.

-  Bean salad mixed with roasted veggies, olive oil, and herbs.  Or a more raw version, like my Black Bean Confetti Salad.

Beet Hummus
-  New hummus flavors (beet hummus, zucchini hummus, broccoli hummus, green herbed hummus, roasted red pepper hummus, roasted garlic hummus, cilantro-lime hummus, sweet potato hummus, artichoke hummus, sour cream & onion hummus, sun dried tomato hummus, guacamole hummus)

-  Veggie chips (sweet potato chips, kale chips, zucchini chips, carrot chips, avocado fries, beet chips)

-  Raw apple sauce by pureeing a granny smith apple, peel and all.

Caramel dip with sliced apples

Homemade Larabars or fruit leather strips

-  Protein packed healthy baked goods (check out my desserts section for ideas)

-  Egg bakes, like a sliced vegetable egg frittata

-  Make a nut butter alternative for dipping apples & celery.  Whip together softened coconut butter with sunflower seed butter, a little almond milk, and powdered xylitol in a stand mixer.  Stir in raisins (optional).

-  Egg salad can be switched up a couple different ways: Classic Egg Salad and Deviled Egg Salad. 

Strawberry-Kiwi Greens
-  Homemade 'Gogurts' or pushpops using these silicone molds (or these ones).  We own the first set.  You can create so many different flavors.  Add plain yogurt, fruit blended with yogurt, fruit & veggie smoothies, mango pureed with coconut, fruit chunks with Strawberry-Kiwi Dynamic Greens, protein shakes, Key Lime Pudding, Chocolate Pudding….so many options!

-  Organic frozen veggies, thawed overnight in the fridge.  I store bags of organic mixed veggies in individual sized servings so I can pull from the fridge easily without measuring the night before, ready for the lunchbox in the morning.

-  Fresh homemade salad dressings taste so much better than store bought.  Your child is more likely to eat their spinach, kale, or lettuce if it tastes good.  Try some of my favorite quick and easy dressing mixes: 9 Fresh Dressing Ideas, Creamy Cucumber Salad Dressing, Ginger Lime Dressing.

KID FRIENDLY SOUPS & CASSEROLES

Thermos brand hot cups
Switch up the sack lunch with a hot soup or casserole.  Preheat the food AND the Thermos cup the in the morning.  Lunch will still be hot come lunchtime!  Remember, you can maximize your food budget by buying in-season fresh produce and freezing it for use later in the year, like the winter when fresh local veggies are scarce.  You also save time by making recipes in double or triple batches and freezing for later use.  I like to store individual servings of soups and casseroles in jars in the freezer for quick and easy lunches.  Some of my favorites to make now and freeze for later:

Chicken Minestrone - using extra vegetables or beans instead of pasta and whatever veggies are fresh and cheap!

-  Chili
, oh how I loooove chili!  I like to switch it up, making a different chili recipe every few weeks: Pumpkin Chili, White Bean Chicken Chili, Healing Cuisine Classic Chili, Turkey-Bean Chili, Texas Chili, Three Bean Chili, Quinoa Chili, Moroccan Chili.

Pacific Natural Foods organic soup
We get the Pacific Natural Foods brand of Roasted Red Pepper-Tomato Soup, the low sodium version.  It's Core Plan approved and from a brand I can trust.  It's a cheaper and easier option than buying my own tomatoes and making the soup from scratch.  I love that it's organic, especially because conventional red bell peppers are on the Dirty Dozen and conventional tomatoes are treated with some pretty bad pesticides!  And, the Pacific Natural Foods cartons are BPA-free, which is a step better than canned soups or other carton brands!

Enchilada Chicken Stew

Quinoa Broccoli & Cheese Soup

Smoked Turkey Split Pea Soup

Tex-Mex Squash Bake

Homemade Hamburger Helper

Chicken & Dumpling Soup

Leek & Potato Soup


Do you have any tricks up your sleeve for switching up your child's school lunch?  Please share in the comments section or on our Facebook page!

Sunday, September 9, 2012

School Lunches Part 3: Menu Planning

I'm back, after a short hiatus last week.  Dave and I have been working hard on plans for our future Greensboro, NC clinic.  We are currently in the south Charlotte area (side note: I am SO HAPPY the Democratic National Convention is over!  Life can go back to normal for us all finally.  We live within a mile of the hotel where all the stuff was happening and the President was staying.  Sounds cool, but let's just say we were counting down the days...  Friday was a happy day!).  We are planning to eventually move north a couple of hours to Greensboro to open our Maximized Living health center and raise our family.  Plans are starting, more news soon as we know more details.  I am getting excited though!!  It's sounding like 2013 will be the year!

I'm happy to be back to finish up our series on Whole Food School Lunches.  This is Part 3 where we'll be talking about Menu Planning.  In case you missed it, you can find Part 1 and Part 2 here.  After this breakdown of how to plan your weekly menus with your child(ren), I'll share a few new recipes that will spice up the lunch box experience for your kid(s) to keep them happy and engaged.

Each month, I keep a tally of how many consultations I do with you guys and what types of consultations.  Lately, each month I am shocked by the outcome.  It used to be that what people needed the most help with was detoxification and customized recipes for allergies.  Now, since about January, you guys are coming to me for help with Meal Planning.  That is by far the most requested consultation I am getting from you.  Today I'm sharing some of my tips with you for free! I'm hoping some of today's post will help with your lunch planning needs.   And enjoy the two PDF templates for free as well.

LUNCH PLANNING 101

I love it when a parent implements a meal planning routine with their child.  Not only are you teaching your kids life skills that they will use later in life on their own, but you are also opening the door for nutrition and health conversations.  You can help your child understand the importance of eating whole foods vs. processed foods, what it means to drink half your body weight in ounces, why sugary beverages can make you sick, and the differences between healthy proteins-carbs-fats vs. unhealthy options.

We're talking about planning lunches on a whole food, real food lifestyle.  Whether your child is following the Advanced Plan or Core Plan, or maybe you are in the baby step stage of just getting your family to eat whole foods.  All of today's tips will help you!  I would just like to explain that while balanced eating is very important (Protein, Carbs, Fat in each meal), it's not about calorie counting or measuring out exact grams or cups of foods.  When you are eating whole foods, simply make sure that each meal contains a Clean Protein, a Healthy Carb, and a Good Fat and you are set.  Your body knows what to do, and as long as you are eating enough for your body size (bigger portion for an adult, smaller portion for a child), you will stay full for 3-6 hours from meal-to-meal.

THE PROCESS

Pick a day that you and your child will sit down and plan your month's (or week's) worth of school lunches.  For us it is the last Thursday of every month.  Start by having your child tell you what he/she would like to see in their lunchbox.  It's important to send them off each day with a balanced meal.  I've created a Favorite Lunch Foods worksheet that you can fill out with your child (pictured below, download it here).  Ask them to list their favorite foods in each category: Clean Proteins, Healthy Fats, Vegetables, and Fruits.  Always include a bottle of fresh filtered water with every lunch (I like to use a Klean Kanteen).  Use this list of favorite foods as your crutch while planning the month/week's worth of lunches.

Favorite Lunch Foods Template
Once you have each child's favorites recorded, work together to mix and match the categories to create complete lunch meals.  I've created a Lunch Menu Template for you to use as your guide (pictured below, download it here).  It's in a weekly format, however I recommend planning your lunch menus out a month in advance.  This sets you up for success, giving you ample time to plan, shop, prep, and prepare.  You may find once you get the system down, that you can cook once a month and make enough food for the freezer to use in lunches for most of the following month.  Remember to refer back to my School Lunches Part 2 discussion on preparing lunch meals in advance.  Also, save each week's menu template after you fill it out.  Reuse it each month or every other month to further simplify the menu planning and save you time, or at least use it as a guide and make adjustments as needed based on seasonal produce!
Lunch Menu Planner Template

12 EXTRA LUNCH PLANNING TIPS

 
Decide to start today!
1.)  Do it.  As with any goal, the first step is making the commitment.  The second step is following through and doing it.  You can't just say you're going to do it, you must decide you will do it.  Set a date to start taking action.  Talk to your spouse and kids to get them involved in the meal planning process.  Have them help hold you accountable.

2.)  Shop strategically.  Pick a day to do your grocery shopping that works best for you.  For me, it's Sundays after 3pm.  Consider your schedule, then cross reference it against how busy your farmer's market or grocery store may be at that time.  Sometimes it's better to wait until later in the day to shop.  Also, consider your market's schedule.  Ask the store manager when they receive fresh shipments on produce.  And stay flexible with your shopping list.  If you're planning on romaine but the spinach looks better, go with the spinach.

3.)  Consume perishables first.  When putting your weekly meal plans together, send your kids off to school with the most perishable items first so nothing goes to waste later in the week.  In my house we have salads or lettuce/kale wraps on Mondays and Tuesdays.
 
Grade your efforts to make improvements.
4.)  Grade your efforts.  When your child brings their lunch box home, have them grade how they liked their lunch.  Have them write a grade, A-F, on the weekly menu planner or use a number system, 10-1.  This opens the door for communication about what they really did or didn't like about that day's packed lunch.  Together, you can make adjustments for next week.

5.)  Budget smart.  Budget your time, budget your money.  Using a monthly planning system allows you to buy foods in bulk to save the most money.  You'll also spend much less time planning one day a month rather than every single day.  Plan to use Sunday dinner leftovers in Monday's lunch.  And when certain foods are on sale, like chicken, avocados, or cauliflower, buy a bunch and freeze it for later in the year.  You can even make double dinners and freeze the 2nd portion for lunches later in the year.
 
Seasonal foodpicks add pizazz!
6.)  Looks count.  Make an effort to keep the packed lunches looking attractive.  A variety of food colors each day is a great start.  You can also include fun freezer packs (I like these ones by Rubbermaid, get a few to switch it up!) or use decorative items like cookie cutters to shape the cheese/fruit/veggies or foodpicks like this one or this one with a fun toppers.  And, your child is never too old for an encouraging note, a picture, or a funny drawing from you included in their lunchbox.

7.)  Variety is key.  Planning ahead means you'll have time to add variety to your kids' lunches.  Throw in a few new foods each week that are not on your child's Favorite Foods list.  If you're dealing with a picky eater who is likely to throw out the new food before trying it, instead try introducing new foods at dinner time first.  You can keep a watchful eye while your child responds to the new food.  Then open dialogue about including it in their lunches in the future.

8.)  Stick to the plan. 
Map out your shopping list in detail to avoid buying processed foods or high sugar content foods.  When shopping, stick to your grocery list for your kids' lunches.  You don't want to forget anything that could compromise the week's menu.

9.)  Establish portion size.  For many parents, it's trial and error to figure out how much food is enough for your child to get through the day.  Growth spurts, extra activity during the school day, and many other things can impact how much food a child needs during the day.  Roll with the punches and continue to try your best to meet his/her needs. 

Larger size compartment lunchbox.
10.)  Design a template.  Depending on the age of your child, they may need more than 1 serving of Protein, Carb, and Fat at lunch time.  This is true especially for Middle School and High School age kids.  Talk with your child about how much food they need during the day, and together design a template to follow for preparing the lunches.  Some kids may need as much as 7-10 different food items to take enough food in to match their growing adolescent body.  For larger size lunches, you may need a bigger bento type box, or two of them, or something like this stackable style Ecobox.

11.)  Schedule baking day.  If you set yourself up for success, it will come more easily.  Schedule a day or two times during the week that you will bake lunch and snack items.  For me, I do our family's shopping on Sunday evenings.  Tuesday mornings once a month are for baking and making freezer desserts.  I actually only bake once or twice per month, making enough to store in the freezer for the rest of the month.  Putting the date on your schedule specifically for baking will encourage you to get it done.

12.)  Be mindful of allergies. 
This is a good tip not only for the safety of others, but to ensure your child is eating only the food that you packed for them.  Talk with your child about how food allergies make it particularly important that everyone eat their own packed lunch.  If a fellow student has a food allergy that you don't know about, something in your lunch could trigger a reaction.  Eat what mom or dad gave you and only that, no trading.

Thursday, August 30, 2012

School Lunches Part 2: 9 Time & Money Saving Tips

I hope you got to read Monday's post, Part 1 of our back-to-school lunches series.  I filled you in on my top school lunch packing must-haves.  Now that you are equipped with everything you'll need to pack a clean & green lunch, let's get to answering some of your questions.

My friend Lyra wrote in on our Healing Cuisine Facebook page asking for ideas to jazz up her kids' lunch experience and foods/recipes she can prepare in advance and freeze for later use.  I've also gotten many emails from you all asking for budget saving tips and preparing whole food recipes in advance and in bulk.  And I hear your pleas!  Switching over to whole food and preservative free food can get expensive without a little extra planning.  There are ways to stay within your monthly food budget while providing your children with real food meals throughout each day.  Today I'm sharing my Top 9 Time and Money Saving Tips!

In Part 3, I will detail how to make weekly and monthly meal plans with your child.  I feel that meal planning and teaching your child WHY they are to eat a balanced whole food meal is the key to helping your child value and enjoy eating this way.  I'll finish up this School Lunches Series by sharing some recipe ideas that are hopefully new to you and sound like fun for your kids.  Alright, let's get to it!

School Lunches Part 2: 
Prep Now, Save Money Now And Time Later


#1)  Balanced Eating:  First, I want to talk a little about the perfectly balanced meal.  This applies not only to lunch, but also breakfast and dinner meals.  If you've done a meal planning consultation with me, you've heard me harping about the critical importance of the balance between Clean Protein, Healthy Carbs, & Good Fat in each meal of the day.  Your body needs these macro-nutrients in large amounts to perform basic cellular functions.  Proteins are the building blocks of cells made up of amino acids, and provides your body with the ability and energy to work, move, exercise and build/maintain muscle.  Clean proteins are your grass fed and pastured meats, grass fed or grass-based protein powders, quinoa, beans, lentils, raw cheese, organic full fat yogurt, and some vegetables (like peas).  Carbohydrates are the body's primary source of fuel.  Healthy carbs will carry your energy level steadily between meals.  When eating within the Maximized Living Nutrition Plans we want to stick to complex carbs, which are fruits and vegetables.  Complete carb lists approved for the Advanced and Core Plans can be found in Chapters 3 & 4 of your book.   Healthy Fats are extremely important, especially as we're talking about kids' lunches for school.  Healthy fats are essential for cellular membrane function, hormone function, optimal brain function, provide focus...the list can go on and on.  Healthy fats will also help you to stay full between meals.  It is important to have a serving of each of these components with every meal for overall brain and body function.  I also include a serving of water with every meal -- remember you need to drink at least half your body weight (pounds) in ounces of water daily for optimal hydration.  Talk to your children about drinking water throughout their school day.

Frozen smoothie ingredients
#2.)  Buy in bulk and freeze for later:  I apply this rule mainly to fresh produce, but it also applies to meat.  This is a huge way we save money every month.  It's also how we can enjoy seasonal produce all year long.  When various produce items are on sale (e.g. organic peaches, avocados, organic spinach, organic berries, organic apples) buy as much as you have the room for and freeze them for use later in the year.  I just did this last week with local organic peaches, kale, grapes,  nectarines, and Granny Smith apples.  I washed and diced everything and stored them in individual baggies in my freezer for smoothies later this fall and winter.  It's such an easy way to have a little taste of summer in the winter.  It also makes for a quick breakfast on the go in the morning.  Just dump, add your protein and liquid, blend and go.  Individual (or double) servings already portioned out!

Also, did you know you can freeze avocados?  I'll freeze them two ways - whole/diced (for later use in smoothies) and pureed with lime juice (for later use as guacamole or in desserts).  And yes, you can freeze kale and spinach.  Frozen greens are best used in smoothies or soups.  I destem, rinse, dry thoroughly, and chop the kale and store in either glass containers or freezer bags (whichever I have the room for).  I buy our organic spinach in bulk at Costco/Sam's Club/B.J.'s Wholesale and pop the plastic bin directly into the freezer.
Freeze avocados in season so you can enjoy through winter.
For this to work in favor of your food budget, you need to watch for sale ads and visit many different grocery stores, co-ops, and farmers markets to find the cheapest prices on organic fresh produce.  Also watch the prices on organic frozen berries and buy up a bunch when sales hit.  You can also ask your grocery store manager if they offer discounts for buying a certain number of items, like a case of frozen strawberries.  Some stores offer 10%+ off for large quantity purchases but you usually have to ask.  You can also contact a local farmer and see what type of a deal they would give you for any leftover produce at the end of each week.  I have done this before and gotten large boxes of mixed produce (tomatoes, kale, broccoli, zucchini, squash) for half price.  The farmer will be happy to make a few bucks for what otherwise they would throw out or donate.

#3.)  Plan Lunch Menus 1 Month Ahead: I can't stress enough how important and helpful it is to plan out your kids' school lunches in advance.  This is my step for success!  If a month seems daunting, start with a week's worth of planning at a time.  You will save the most time and money doing it a month at a time though, because you can take the most advantage of using produce/meat/yogurt/etc while on sale that you bought in bulk.  Design the rest of the months meals using those bulk ingredients.

Part 3 of this School Lunch Series will be outlining how to meal plan school lunches with your child.  I recommend involving your child(ren) in the process.  This opens the door for talking about healthy vs. unhealthy foods, portion control, hydration, etc.  Depending on their age, you may choose to do all the planning yourself and gauge them for feedback each day or week.  It's totally up to you!  But the more you involve your child, the more likely they will be to eat their lunch (and enjoy it!).  Have your child pick out their favorite main dishes, side dishes, desserts and snacks.  Then you can put together a menu together for each week.

#4.)  Nut-free School?  No sweat.  There are other whole food and grain-free options for baking other than almond flour:  garbanzo bean flour, garbanzo-fava flour, quinoa flour, buckwheat flour, coconut flour, or brown rice flour.  While using higher carb load flours like garbanzo and brown rice are not ideal long-term, these are much healthier nut-free alternatives to wheat/white flours that are higher in sugar and contain gluten.  And if your child loves their PB&J, most peanut-free schools will allow sunflower or coconut butter.  Spread that between sprouted grain Ezekiel bread with some organic unsweetened jam and you're all set!

Frozen 8oz lunch size portions of soups and casseroles.
#5.)   Freeze meals in 8 oz - quart size jars:  Depending on the number of children in your family that attend school, use the appropriate jar size to freeze soups, casseroles, even oatmeal for later in the month.  (Leave 1/4 inch of room at the top for expansion.)  When making dinner, double the recipe.  Make two pots of soup or two trays of casserole.  Serve one for dinner, then jar up the rest and freeze.  An 8 oz jar is about the perfect size for 1 lunch serving.  A larger quart size jar is enough to feed 3-4 kids.  The morning before you plan to send the jarred food for lunch, pull it out from the freezer and thaw in the fridge overnight.  In the morning, warm the Thermos container with boiling hot water while you heat up the soup/casserole from the jar to a piping hot temperature (a simmering temperature will be best to maximize heat temperature in the Thermos).  Add the hot soup/casserole/oatmeal/whatever to the Thermos container and finish packing the side dishes.  Warming the Thermos in advance of adding the hot food is key to keeping the contents hot for 4-5 hours until lunch time.

#6.)  Use ice cube trays to freeze small portions:  Similar to using jars above, you can use ice cube trays to freeze 1 ounce servings of homemade sauces, condiments, dressings, broths, dips, etc.  Pop out of the ice cube trays and store in a baggie or container in the freezer for use later in the year!  The day before you want to add one of the sauces/dips/condiments to the lunch, pull the perfect serving size out of the freezer and thaw in the fridge overnight.  Give it a stir in the morning and you're ready to add it to the lunch.  My favorites to make and freeze: Apple Butter, Chocolate Coco-Hazel-Nut Spread, Healing Cuisine's Ketchup, Marinara Sauce, Teriyaki Sauce, Ginger Lime Dip, Green Herbed Humus, Spinach Artichoke Dip, Healing Cuisine's BBQ Sauce.

#7.)  Freeze individual portions of baked goods:  I like to make muffins, cupcakes, protein bars, quick breads, cookies, and cakes in advance, slice them up into individual serving sizes, then freeze for later.  They'll last months in the freezer!  Layer slices of bread, cake, or cookies between parchment paper to prevent sticking.  You can even do this with my Almond Flour Tortillas!  Baked eggs freeze really well, too!  You can bake egg omelets/quiches/casserole/frittata in muffin tins then freeze.  The day before you are ready to include a frozen baked good in the lunch, pull from the freezer and thaw in the fridge overnight.  It'll be thawed by morning.  My favorite recipes to bake then freeze: Vegetable Frittata, Blueberry Bread, Zucchini Bread, Cranberry Nut Bread, Chocolate Chip Cookies, Gooey Brownies, Dark Chocolate Chip Orange Bread, Strawberry Cream Pie.

#8.)  Prepare lunch components 1 week in advance:  There are parts of the weekly lunch menu that you should be able to make in advance.  On Sunday, get those components prepared and portioned out for grab-n-go later in the week.  Some examples: wash and chop fresh produce, hard boil eggs, boil brown rice pasta, prepare freezer smoothies and/or homemade push pops, mix up a blend of trail mix, poach/bake chicken or turkey breasts, double a soup/stew/casserole recipe.

#9.)  Get lunch packed the night before:  If you're like me, you'll appreciate a few extra minutes of sleep in the morning.  The less lunch worrying and packing you have to do in the morning, the easier your mornings will be.  The night before, pack as much of the next day's lunch as you can.  Get everything portioned out into their containers/bags.  Lay out the lunchbox(es) on the counter with the napkin, silverware, water bottle, etc.  Make sure the ice packs made it back into the freezer.  And reference your menu plan to make sure you pulled out all the food from the freezer that needs to thaw for tomorrow's lunch.  In the morning, packing everything up will be a breeze.  Heat up any food that needs to on the stove or in the oven, and that should be all the work you'll need to do!  Everything else should be packed and ready to pop in the lunchbox!

Monday, August 27, 2012

School Lunches Part 1: The Tools

Happy first day of school to many of you!  Back-to-school time leaves many of us moms wondering how we can maximize our kids' lunches with nutritious whole food meals.  I have lots of tips to help make lunch sack packing less of a chore and recipe ideas sure to keep your child happy!  I am breaking this School Lunches series into parts to make it easier for you to follow along.  Today is Part 1: The Tools.  I'm going to share my favorite tools and "go to" items that can be used as staples throughout the year.

Some of you may be remembering while I do have a child, he is only 11 months old.  "How could Elise know how to pack school lunches?"  Well, let's just say I have packed hundreds of lunches in my day.  I hated eating out in undergrad, but was on campus usually from 7am-9pm most every weekday.  I did a lot of lunch and snack packing.  And while my husband was in grad school, I sent him off with a packed lunch every day of Advanced Plan foods.  (His favorite thing to find in his lunch box to this day is "ants on a log.")  I had also spent 3 years as a part-time nanny for several families in the Twin Cities area, and was in charge of carting the kiddos around and managing our afternoon lunches.  That was a pretty eye-opening experience for me.  I learned that kids, even from families who eat organic foods, can still be picky eaters.  That was when I started experimenting with other ideas, like food shapes and smoothie pops and recipes that keep kids engaged through lunch time.  I am excited to share these ideas with you and hope you and your child enjoy making and eating them!

School Lunches Part 1:  The Tools

Start out the year with non-toxic reusable lunch boxes, water bottles, and utensils.  Some of my favorites:

Ziploc divided storage
-  Bento style lunch boxes.  The bento style means the box has separated compartments for each food/side dish.  You'll use less plastic or paper baggies separating foods this way.  Everything packs neatly into one slim container.  They make 18/8 grade stainless steel options like this box style or this stackable tiffin style.  I also really like the plastic Ziplock bento style as an option (Rubbermaid makes a similar product), especially when a liquidy side dish is packed as the Ziplock lid will be more leak proof compared some stainless steel options out there.  Obviously the 18/8 grade stainless steel is the cleanest option as far as toxicity is concerned, but on a budget and for functionality the Ziploc or Rubbermaid containers will certainly work.  They are BPA-free, that is a plus.  You mainly need to be concerned if the plastic will be heated up with the food or if hot food is placed into the plastic container.  That is when the most chemical transfer occurs from the plastic into the food.  I also like using the Ziploc bento for younger children instead of the stainless steel because it is lighter weight and easier to carry for little arms.  It's also budget friendly and recyclable, in case it accidentally gets left at school or lost on the bus -- easy to replace and no tears over the loss.  We use both stainless steel and the plastic Ziploc personally.

Klean Kanteen
-  18/8 grade stainless steel water bottle.  I can't stress it enough how important it is to send your child to school with a water bottle.  Even if the only time they'll drink from the water bottle is at lunch, at least you know that some of the water they drink at school is clean filtered water.  Drinking fountains are dirty and pump out tap water.  And you don't want them drinking bottled water from a vending machine because you don't know if the bottles were heated up in transport causing plastic leaching, let alone where that water came from either.  Talk to your kids about the importance of staying hydrated and the health benefits (proper hydration = ability to focus!).  I like the colorful Klean Kanteens or the Disney themed stainless steel Thermoses.  If it's colorful and fun, kids are more likely to use it!  Have your child pick out their favorite color!  *TIP* Chill the bottle in the fridge over night for maximum chilling power through the day at school.

Thermos brand food container
-  Hot food containers.  It's a great idea to switch it up from the same mundane lunches week after week.  When you're feeling in a rut, send them in with a hot lunch of soup, oatmeal, or leftover casserole from dinner.  Thermos brand has fun Disney themed options for these as well, or LunchBots also makes a thermal option.  *TIP* To get the max 5-6 hours of hot insulation out of these thermal cups, warm them up first by pouring boiling water inside and let sit for about 10 minutes.  Dump water out and add piping hot food and seal.  Add to sack lunch and ready to go!  It'll still be hot a lunch time.

-  Eating utensils.  I am a huge fan of reusable whenever possible.  Reduce and reuse.  It's also often the healthier option.  I think I shared my favorite bamboo eating utensils in a past Christmas gifts post, but here they are again.  You can also get camping style compact titanium utensils which are super light weight.
Titanium Spork
KOKO FreshPocket lunch bag
-  Lunch bag.  It's a good idea to still use a lunch bag to carry everything in, even if you're using a bento box, just in case something leaks.  A good quality lunch bag can also be chilled and will have room to store ice packs to keep your lunch fresh.  Look for something that opens on the side rather than the top.  This allows you to maximize your packing space.  This is the one that we use personally, the KOKO FreshPocket (just ignore the fact that they call it "the man's lunchbox" lol!).  It's the perfect size to fit everything, including a Thermos water bottle!  And with 2 ice packs in the built in compartments, it keeps our food cool for about 5 hours while sitting at room temp.  I have heard these Neoprene purse style bags are fabulous at insulating when ice packs are used, and they're roomy with extra stretch for large load days.  I see Thermos has their own kids lunch bags, and I do love the quality of their brand so I'd trust these bags to try them (and can't go wrong with that price!).

Fun Rubbermaid icepacks
-  Ice packs.  You probably already have a few in your freezer ready to go, but I had to share the CUTE ones a family I used to work for had for their children.  They are from Rubbermaid.  Each child had their own animal.  It was a cute way to personalize their lunches and keep them engaged.  We, personally, use the ice packs that are slim designed.

Reusable fabric baggies
-  Instead of plastic baggies.  Again, I am all about reduce and reuse.  Also, the type of plastic that is used to make plastic wrap and plastic bags is one of the worst as it easily leaches the plastic into the food it touches without heat exposure.  For long term cost savings and instant health promotion, switch to stainless steel containers, glass containers, reusable cloth type baggies, or stronger and safer plasticware like the Ziploc storage bentos.

Mini silicone push pop molds
-  Homemade push pops or 'gogurt'.  This is by far one of my favorite whole food lunch ideas.  I found these push pop style silicone molds that any kid is sure to love!!  We use them and looove them and we're big kids!  They're so easy to use, just pour in what you want to freeze, pop on the cap and it's ready to freeze.  I'll fill them with leftover smoothie, coconut milk mixed with lime zest, Greek yogurt and fruit, pureed mango with coconut milk, and (on the rare chance we have any leftover) homemade ice cream.  After a few hours, the consistency will be more like soft serve, but it's still really fun to roll up the bottom of the tube to eat your frosty treat.  Here is another brand in the same size.  They also make a mini size -- so cute for kindergarten/1st grade!  The trick in using these successfully over and over again is to wash them the same day, and get one of those bottle brushes, the skinny kind, to get all the way down to the bottom.

Too cute! - lunchbox art
-  Make food fun.  Cut veggies and fruit in fun shapes and design food art out of your shapes.  It's the fun little touches that excite your child when they open their lunch box and help them have a good time while eating healthy.  Believe me, there will be a kid chomping away on a cupcake, candy, or some food your child would rather have, but food art could help make the less desirable healthy foods 'taste' better!  Use cookie cutters you already have, or pick up some fun new ones.  Get creative!  Have your child help you pack their lunch the night before and let them design with the shapes.  Some ideas:  stars and flowersChristmas, flowers and leaves, classic circles, animals, butterflies and flowers, or plane, train, racecar.

Cloth napkins from Etsy seller GreenLittleNest
-  Cloth napkins.  Reduce and reuse, right?  You can make your own cloth napkins with your child, or help them pick out a colorful set of their own for the school year.  Cocktail size would be perfect!  A pack of 5 or 6 will be enough to get you through each school week.  Just toss them into your laundry load each week.  You actually save $$$ this way, and keep napkin waste out of the trash!  Here is a cute set from Amazon.com, or you can find lots of cute options on Etsy.com.


Come back tomorrow!  I'll be sharing some tips for planning lunches in advance.

Saturday, August 4, 2012

Questions Answered: Grain Free Chicken Nuggets

Happy WEEKEND everyone!

Boy did I ever need this weekend to arrive.  It's been a long week with Austin, and I appreciate the few extra hours that I have my husband home to help me this weekend.  Austin is about 10.5 months now, and his mood swings are high and often lately.  From what I've read on some attachment parenting forums, this is about the age where he's developing a lot of new skills all at once (walking, talking more, expressing new emotions, eating new foods, more teeth, etc etc) and it can be overwhelming, so babies often release in this way.  What do you all think?  Experience the same moodiness with your little one(s) at this age?  Well it's been almost a week straight.  I'm fried.  And on top of it, I've worn myself down and come down with a cold.  I am in need of a momcation!!  :)

Now, while I sip on my Healing Cuisine Tincture Tea and think of all the ways today was a blessing and a gift, I'll answer a recipe question from Tyese P.:

"I wanted to know if you can help me come up with healthy versions of chicken nuggets and pizza. My kids love to eat them, but I don't like the unhealthy ones... If you could help me out I would appreciate it.  Thanks!"  - Tyese P., Illinois
These are two great recipe requests, and two that every mom should have up her sleeve.  You are right on, Tyese.  Chicken nuggets and pizza bought in the frozen food aisle, the deli section, or from a fast food restaurant are all extremely unhealthy and can be laden with chemicals, preservatives, and food dyes.  Grains and sugar can be the least of your worries when buying a manufactured chicken nugget or pizza!  Have you peeked at the ingredients list of one of those packages lately??

I'll be sharing my recipe for chicken nuggets today, and pizza tomorrow.  I looked up Tyson Chicken Nuggets.  That is the brand my mom fed us growing up.  This nutritional and ingredients info is direct from their website.  Check it out:

At first glance you might say, wow that's not so bad!  But let's remember where this chicken came from, how it was raised, and how it was butchered.  When you hear the brand name "Tyson," you may remember that they are known for loading their birds with chemicals BEFORE the butchering takes place...probably so they don't have to post the chemicals on the ingredients label since it's not added during the manufacturing process?  I remember news reports came out about that a few years back, also about the way they treat their animals....  Google it!

My point is, this meat is not coming from free range pastured chickens.  We don't know the chemical burden of the meat, which also means the fats are compromised.  If we continue to look at the ingredients list, you can see there is a lot of wheat going in (sugar), and corn (sugar), and vegetable oil (bad fat).  And look at all the salt!  Bad salt, too.  It's not our healthy Himalayan mineral sea salt.  And on a label when you see "spices" or sometimes it can read "other flavorings," that can mean MSG.  Who really knows what they are hiding by using a vague term like that.

Your kids deserve better!  Start with some free range organic chicken and make these nuggets with Advanced Plan ingredients!  My recipe is below.  I have decided to share this recipe which is originally found in my Kid's Birthday Party e-Book.  Inside, you'll also find easy Core and Advanced Plan menu options perfect to please your birthday boy or girl and their party guests!  The menu list includes: Almond Crusted Chicken Strips, Sweet Potato Fries, Caramel Apple Slices, Banana Nut Stacks, Chocolate Almond Snack Bars, Very Berry Smoothie, Strawberry Lemonade, Vegetable Art, Vanilla Cupcakes with Chocolate Frosting.

Grain Free Chicken Nuggets
Makes 24 Nuggets

1/2 cup almond flour, sifted
3 Tbsp coconut flour, sifted
2 tsp paprika
1 tsp garlic powder
2 tsp onion powder
1/2 tsp dry mustard
1/4 tsp sea salt
1/4 tsp fresh black pepper

1 1/2 tsp olive oil 
3 free range eggs
1 lb free-range boneless, skinless chicken breasts (approx. 2 large breasts)
4 Tbsp coconut oil, melted

1.)  Preheat oven to 475°F.  Set a wire rack on a foil-lined baking sheet and brush with coconut oil. Wash and dry chicken breasts.  Cut each breast into 6 uniform strips, then cut each strip in half.  Use a meat mallet to pound out thick nuggets to each nugget is of uniform thickness.  Lay out on a plate and set aside.


2.)  Place almond flour, coconut flour, paprika, garlic powder, onion powder, dry mustard, sea salt and pepper in a food processor.  Pulse until the the paprika is mixed throughout, about 1 minute.  With the motor running, drizzle in the olive oil.  Blend until just combined.  Transfer the mixture to a shallow dish.


3.)  Whisk eggs in a second shallow dish.  Add chicken nuggets to eggs and turn to coat.  Transfer each nugget to the almond mixture and dredge evenly on all sides.  Place the chicken nugget on the prepared rack.  Repeat until all chicken nuggets are dredged and on the prepared rack.


4.)  Brush each nugget with coconut oil.  Flip and coat the other side.  Bake the chicken nuggets until golden brown, crispy and no longer pink in the center, 20 to 25 minutes.  Serve with organic ketchup and honey mustard.

TIP:
  Prepare in advance:  Bake, cool and freeze in an airtight container.  Simply remove from freezer and pop, frozen, into oven at 350 degrees F until warmed through.  May need to cover with aluminum foil to prevent burning during reheat.


Tune in tomorrow for Advanced Plan PIZZA!

Tuesday, July 31, 2012

100% Pure WINNERS + Broccoli Cheese Soup

Thank you to everyone who entered and shared the giveaway this past week!  I hope you all have enjoyed getting to know 100% Pure.  Be sure to bookmark their website!

We have TWO lucky winners of the 100% Pure Black Tea fruit pigmented mascara.  Congratulations to our winners: KristenB and Natalie Bean!!!  Please email me with your mailing address and your tube of Black Tea mascara will be on its way to you by tomorrow.

Now, I need to answer Cortney B.'s question:

"I  am looking for ideas for broccoli cheese soup.  I used to use Velveeta.  Any suggestions on how I can alter it for either Core or Advanced Plan?"  - Cortney B., Wyoming
I've been working on perfecting my broccoli cheese soup quite recently actually, just as Courtney wrote in.  I like to add quinoa to mine, which will thicken the soup up quite a bit, but makes it hearty and filling.  Adding the protein of quinoa also makes this soup a complete meal on its own!  Alternatively, you can leave the quinoa out for a thinner soup.  Replace with shredded chicken or white beans to make this a whole meal.

Broccoli Cheese Soup
Makes 6 Servings

3 cups organic broccoli florets (I used frozen)
1 Tbsp raw butter or coconut oil
1 cup yellow onion, chopped
1/2 cup dry organic quinoa (I like the tri-color, but any color is fine)
4 cups sodium-free organic vegetable stock
1 1/2 cups organic unsweetened almond milk
Sea salt and fresh pepper, to taste
1/2 tsp garlic powder
1/2 tsp ground thyme
1 tsp Worcestershire sauce
1/4 tsp nutmeg
1 1/2 cups raw cheddar cheese, shredded

1.)  If you prefer, chop the broccoli into bite-sized pieces now and set aside.  (I leave mine whole.)  In a large saucepan over Medium heat, add the butter and onion and saute until soft, about 8-12 minutes. Add the vegetable stock and bring to a boil.

2.)  Rinse the quinoa until water runs clear, then add to boiling vegetable stock.  Reduce heat to Medium-Low.  Stir in broccoli, cover, and simmer for about 16-20 minutes, until quinoa is tender.

3.)  Puree the cooked mixture with an immersion blender or carefully in a standing blender. (I don't puree mine, I like the quinoa and broccoli texture.  However this soup is traditionally prepared smooth.)  Return the soup to the saucepan and add the almond milk, garlic powder, ground thyme, Worcestershire sauce and nutmeg.  Season with sea salt and pepper.  Reheat the soup on Low heat, being careful not to boil it.  When the soup is hot, stir in the cheese until just melted and serve immediately.

Saturday, June 9, 2012

Reworked: Mediterranean Salmon-Quinoa Salad

Last night, my husband and I had a booth at a local Family Fun Festival where we put on our "Dr. Dave" and "Health Expert Elise" hats and greeted families in our community to create awareness for our wellness clinic.  A lovely couple, who as it turned out belong to our church (such a small world!), came over to say hello and tell me they are Healing Cuisine followers and their favorite recipe is my Mediterranean Chicken-Quinoa Salad.  I told them that is on the top 10 favorites list in our home, too.  And as I told them this suggestion to "rework" the recipe for a little something new, it reminded me I still needed to share it with all of you.  Introducing the One Pot Wonder:

Mediterranean Salmon-Quinoa Salad
Makes 4 Servings

1 cup dry white quinoa, rinsed
2 cups sodium-free vegetable stock
3 5-oz cans wild caught Alaskan salmon, drained and picked for bones
1/2 cup red onion, diced
3/4 cup organic sun dried tomatoes, diced
1/2 cup organic artichoke hearts, diced
1/3 cup organic capers, drained
1/4 cup red wine vinegar
1/4 cup fresh lemon juice
1/3 cup olive oil
3 garlic cloves, minced
1 Tbsp dried oregano
1/4 cup dried parsley flakes
1 tsp sea salt
1/2 tsp fresh black pepper

1.)  Bring vegetable stock to a boil in a large pot.  Add rinsed quinoa to boiling stock.  Lower heat and cover at a simmer.  Let cook for about 20 minutes, or until all liquid is absorbed.

2.)  Remove from heat.  Fluff with a fork.  In a large bowl, add quinoa, salmon, onion, sun dried tomatoes, artichoke, and capers.

3.)  In a small bowl, whisk together red wine vinegar, lemon juice, olive oil, garlic, oregano, parsley, sea salt, and pepper.  Pour over quinoa mixture and toss to coat.  Serve warm or cold.

I like to top my plate as the picture shows above: a few dashes of hot sauce (my favorite flavor is Shoot That's Hot!), a couple hefty pinches of nutritional yeast, grated Parmesan cheese, and half an avocado.  SO GOOD!  Enjoy this rework!

Related Posts with Thumbnails