healing cuisine logo

healing cuisine logo
Showing posts with label snack. Show all posts

Wednesday, September 26, 2012

Pumpkin Spice Pudding

It's another "double feature" Wednesday!  Our usual Wordless Wednesday picture posted earlier this morning.  I also have to share my latest dessert recipe for Pumpkin Spice Pudding.  I couldn't wait another day (and neither could some of you over on the Facebook page)!  It is that good.


Ever since Dave surprised me with a Vitamix this summer, I've really been into making raw and semi-raw recipes.  I can finally get the sauces and desserts and smoothies blended super smooth compared to our generic version of Magic Bullet that I had been limited to prior.  I have always loved using raw nuts as the bases of sauces, ice creams, cheesecakes, and so many other things.  Using raw nuts allows you to get the creaminess of dairy without using it.  I recommend to anyone on the Advanced Plan to eliminate dairy as much as possible because it is sugary and an inflammatory food, even in raw or organic form.  Using blended nuts is a fabulous way to enjoy rich and creamy dishes without dairy!  It also packs in extra protein and good fats!

For this recipe, I used soaked raw cashews.  Soaking nuts prior to use does a couple of things.  People do it mostly because it starts the germination process, making the nut more nutritious (just like sprouting a grain) and helps it to shed any impurities.  Soaking also allows the nut to absorb extra water and become softer, making them easier to blend up and provide a creamier texture.  For cashews, you should soak them for at least 2 hours, but I usually recommend about 6-8 hours for full on creaminess.  Then, rinse them under cold water until the water runs clear, and they're ready to use!

Pumpkin Spice Pudding
Makes 2 Servings

1 cup soaked raw cashews
1 cup organic unsweetened almond milk
1 cup organic pumpkin puree, chilled
stevia, to taste
1 Tbsp ground cinnamon
1 1/2 tsp ground nutmeg
1 tsp ground ginger
1 pinch ground cloves
1 pinch sea salt

1.)  Add the soaked cashews (drained and rinsed) to blender.  Add a few Tablespoons of almond milk and begin blending.  Gradually bring blender up to High speed and begin streaming in the almond milk until a thick cream forms.  Continue to blend until completely smooth, almost the thickness of heavy whipping cream.

2.)  Add all remaining ingredients to blender and blend on Medium-High until well combined and smooth.  [I wait to add the stevia until the end, when it's smooth and combined.  Then I taste it and gauge how much stevia is needed.  It depends on how sweet your cooked pumpkin is, each batch is different.  I usually use about 1 tsp of Spoonable Stevita stevia, give or take.]  Spoon into serving dishes, top with a sprinkle of cinnamon.  Eat immediately or store in fridge until ready to serve.

Tuesday, August 21, 2012

Dark Chocolate Chip Orange Bread

We had some friends staying with us this weekend from Minneapolis area.  You know that if you're a guest at my house I am going to make you a healthy treat.  We all wanted something with a touch of chocolate.  Chocolate orange sounded pretty good on Saturday evening, so I made an almond flour loaf with orange zest and dark chocolate chips.  I wanted to make a coffee frosting for it using coconut butter, but to be honest it was so late when we finally ate the bread that I didn't feel like melting down the coconut butter and whipping it with coffee.  (I still think it would be an amazing pairing!)  Instead I opened a can of coconut milk and scooped out the fluffy white cream solids from the surface.  Save the separated oil in the fridge for a smoothie later.  To the coconut cream solids, stir in some stevia, cinnamon, and vanilla and you're good to go!  It makes a yummy sauce to drizzle over your slices of bread.  Eat them with a fork and a nice cup of tea!

Dark Chocolate Chip Orange Bread
Makes 2 Loaves

3 cups almond flour, sifted
3/4 cup coconut flour, sifted twice
1 1/4 cup 73+% dark chocolate chips
5 tsp spoonable Stevita stevia
4 tsp baking powder
2 cups pureed organic Granny Smith apple (OR two whole organic oranges, peels removed and pureed)
3/4 cup raw butter or coconut oil, melted
2 free range eggs, beaten
2 Tbsp fresh orange zest (zest of 2 oranges)

1.)  Preheat oven to 350 degrees F.  Grease two standard loaf pans and line with unbleached parchment paper.  In a large bowl, combine almond flour, coconut flour, chocolate chips, stevia, and baking powder.

2.)  In separate bowl, mix together pureed apple, melted butter, eggs, and orange zest.

3.)  Add the wet ingredients into the dry and blend until just combined.

4.)  Spoon batter into greased loaf pans.  Bake 45 - 50 minutes, until knife inserted into center comes out clean.  Cool 10 minutes in pan before removing loaves to cool completely on wire rack.

Thursday, August 9, 2012

Pumpkin Pie Smoothie

Last night, I snapped this picture with our iPad and shared it on the Facebook page:

... And told you it was a Pumpkin Pie Smoothie.  You wanted to know how to make it.  I didn't realize I have never shared my recipe here with you before.  So here it is!  And who said you could only enjoy pumpkin in the Fall?  :)

Pumpkin Pie Smoothie
Makes 2 Servings

1 15oz can organic pumpkin puree
2 cups unsweetened vanilla almond milk
2 tsp ground cinnamon
1/4 tsp ground cloves
1/2 tsp ground ginger
1/2 tsp ground nutmeg
1/2 tsp ground allspice
20-30 drops pure liquid stevia, to taste
8 ice cubes
2 scoops vanilla protein powder
2 handfuls organic certified gluten-free rolled oats (optional)
coconut milk (optional)

Add all ingredients to blender and puree until smooth.  I recommend adding the protein powder last, after all other ingredients are blended smooth, to prevent foaming.  If you like your smoothie thick, replace half of the almond milk with coconut milk.

Monday, April 30, 2012

Chocolate Peanut Butter Chia Pudding

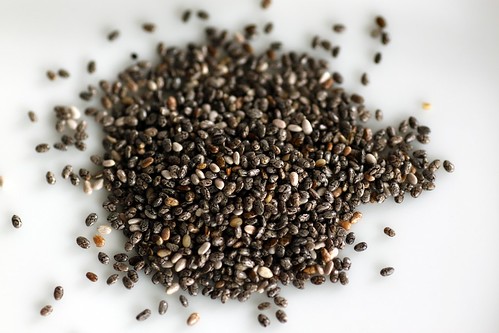
I've been enjoying chia seed pudding for a while now.  I had been using chia seeds sparingly in dessert recipes only prior to that.  I was a little skeptical over using them as a main ingredient in a dish.  If you haven't used them before, when you soak chia seeds in water they soften, plump up (similar to flax seeds) and turn into a gel.  They make a great egg substitute or thickener in many whole food recipes.  Finally, one day I decided to go all in and make the chia seed pudding many of my blogging friends were making.  It's simple!  Soak 2/3 cup of chia seeds in 2 cups of unsweetened almond milk.  Stir every 5 minutes for about 30 minutes and you've got chia seed pudding.  It's about the texture of tapioca, and growing up that was my kind of pudding.  I was ecstatic after my first bite of chia seed pudding!  I like to flavor with a little stevia and vanilla extract.  Yum!  You can also stir in a bit of cocoa powder to make it chocolate chia seed pudding.

Okay, so now that you know my basic chia pudding recipe, let me fast forward a couple years later to my favorite chia pudding of today.  I've been eating this quite often lately, a few days a week, ever since Trader Joe's started carrying organic raw Valencia peanut butter again.  I call this Chocolate Peanut Butter Chia Pudding.  If you have picky husbands or children, just leave the word "chia" out of the name and they won't ever have to know it's a healthy dessert!


Chocolate Peanut Butter Chia Pudding
Makes 2 Servings

3 Tbsp organic non-GMO black chia seeds (I like Nutiva brand)
1 cup unsweetened almond milk
1-2 Tbsp organic raw Valencia peanut butter (to taste)
1-2 Tbsp pure cocoa powder (to taste)
Stevia (to taste)
1/2 scoop protein powder (optional)

1.)  In a clean spice grinder, grind the chia seeds into a powder.  (This step is optional.  I alternate the way I prepare the chia seeds.  Sometimes I grind them first, sometimes I leave them whole and wait a little longer for them to gel up. Both ways are delicious!  Grinding allows them to gel up within minutes, so you can eat the pudding right away after blending.)

2.)  Add almond milk and chia seed powder into blender.  Blend on High for about 15 seconds, until smooth.

3.)  Add all other ingredients to blender.  Blend until smooth.  (Add more almond milk if too thick.)  Transfer to serving dishes and enjoy.  Will last in fridge for 3-4 days.

Monday, April 9, 2012

Lemon Garbanzo Bean Pound Cake

**UPDATE**  I have changed the recipe slightly by removing the whipped egg whites.  I received a few emails about the pound cake falling after removing from oven and it seems the whipped whites + humidity was the problem.  Updated recipe is now reflected and you should get the same results as shown in my picture below every time you bake this tasty treat!

(Originally Posted on March 5, 2012)

I'm not leaving much mystery to the secret ingredient in this lovely light yet dense pound cake.  Garbanzo beans make up the bulk of the batter!  I originally designed this recipe for a friend of mine.  We share the same birthday, and this past January 29th, this was her birthday cake request.  She was trying to stay on the Advanced Plan while eliminating coconut, almond, chocolate, and cashew from her diet.  For a moment, I thought I had no idea what to make her!  But then I thought back to the recipe for Black Bean Brownies, and I know others have made cakes using beans and even veggies like cauliflower.  So using the brownies as a base recipe, I designed this garbanzo bean lemon cake and it was divine!  We topped ours with organic whipped cream sweetened with stevia and vanilla and large scoop of almond milk ice cream.  It would also be lovely on its own with a cup of tea.  You could also add poppy seeds if you wish.


Lemon Garbanzo Bean Pound Cake
Makes 1 9" Round

2  15oz cans garbanzo beans, drained and rinsed well
6 free-range eggs
1 1/4 cups powdered xylitol
1 tsp baking powder
1 tsp baking soda
1 tsp vanilla extract
1/4 tsp sea salt
zest of 2 lemons
juice of 2 lemons

1.)  Preheat oven to 350 degrees F.  Line the bottom of a round 9 inch spring form pan with unbleached parchment paper.  Grease the sides of pan with coconut oil.  Add garbanzo beans and eggs to food processor and puree until smooth, about 2 minutes.

2.)  Pulse in the xylitol, baking powder, baking soda, vanilla, sea salt, lemon zest and lemon juice, until batter is smooth

3.) Pour batter into spring form pan and bake about 45-55 minutes, until light brown on top and a knife comes out clean from the center.

In case you aren't already following our 40 Day Renewal through Lent, check out today's post.  It's a guest post from me!  Top 6 Reasons to Eat Breakfast

Saturday, February 25, 2012

Almond Flour Chocolate Chip Cookies

After emails from a few different folks requesting and almond flour chocolate chip cookie that used eggs, I'm finally satisfied with the way this following recipe turned out.  It took a few tries to get it right, so the cookie wasn't too hard, too soft, too puffy, too crumbly, etc.  To get the same results I suggest following *exactly* how I write it out below.  I still like my first Chocolate Chip Cookie recipe better (doesn't use eggs).  But for those who asked, I hope this satiates your cravings!


Chocolate Chip Cookies

Makes 16 Cookies

1/2 cup butter, room temp
1/2 cup xylitol, powdered
2 free range eggs
3 cups almond flour, sifted
1 tsp pure vanilla extract
1/2 tsp baking soda
1/4 tsp sea salt
1 cup 73+% dark chocolate chips / chunks

1.)  Preheat oven to 350 degrees F.  Line a baking sheet with unbleached parchment paper.  In your mixer bowl, cream the butter and xylitol together on Medium-Low.  Add vanilla and eggs one at a time, until smooth.

2.)  Mix in almond flour, baking soda, and sea salt until just blended.  Stir in chocolate chips last.

3.)  Scoop out cookies in about 1 1/2" sized balls onto cookie sheet.  Flatten each out with your fingers to the thickness you prefer (they will only rise slightly from the baking soda, but won't spread on their own while baking.  They need your help.).  Move to oven and bake for 15-18 minutes until golden brown.

4.)  Remove from oven and cool on baking sheet for a few minutes before transferring to cooling rack.

Friday, October 21, 2011

Bumble Bars

These are a little different than the "traditional" bumble bars made with sugar, Cheerios, etc, that my family made growing up.  I've put my Healing Cuisine spin on it!  Feel free to add a handful or two of 73+% dark chocolate chips to the bars, too.  Stir in with the nuts.

Bumble Bars

2 cups raw sesame seeds
1 cup raw sunflower seeds
1 cup raw cashews
1 cup coconut flakes
2 cups organic raw unsalted Valencia peanut butter OR almond butter
1/3 cup honey
2 tsp sea salt

1.)  Line a 9 x 13 inch baking pan (or a 9 x 9 inch pan for thicker bars) with unbleached parchment paper.  Preheat oven to 350 degrees F.

2.)  In a large bowl, stir together Valencia peanut butter, honey, and sea salt.  Stir in nuts and coconut flakes, mixing until evenly combined.

3.)  Pour and spread mixture into baking pan.  Bake for 12 minutes.  Remove from oven.  Cool to room temperature.  Cut into individual bars, wiping knife clean between cuts as needed.  Enjoy or store in fridge until ready to eat.

Sunday, June 19, 2011

Sweet-n-Spicy Ginger Smoothie

Happy Father's Day to all dads and dads-to-be today!  What are you making for the special man in your life?  If you're not yet sure, I encourage you to try out my newest salad creation: Grilled Hamburger Salad!  It's quick and easy to make, and helps dad stay on his Maximized Living Nutrition Plan while still enjoying all the flavors of his favorite burger.

Stay tuned for Picnic Week starting tomorrow!  I've mastered 8 new picnic-friendly recipes that are simple to make and easy to tote!  Excited to share them with you over the next eight days.

Today, I am sharing what we had for breakfast this morning.  My tummy was feeling a little uneasy (thanks somewhat to the little person living inside of me I'm sure), so I wanted a gingery smoothie to help ease it.  This smoothie turned out very tasty!

Sweet-n-Spicy Ginger Smoothie
Makes 2 Servings

1 1/2 cups full-fat organic Greek yogurt
1/2 cup full-fat organic coconut milk
1/4 cup organic unsweetened almond milk
1/4 cup fresh lemon juice
1 tsp fresh lemon zest
1 Tbsp fresh ginger root
12 drops pure liquid stevia
2 scoops unflavored or vanilla protein powder
1 cup ice
Pinch of cayenne (optional)

Blend ingredients in blender until smooth.  Serve immediately.

Come back tomorrow for the kick-off to Picnic Week!!

Wednesday, May 11, 2011

Key Lime Pudding

So I've had a bit of a rough week here food-wise.  Dave and I attended an event this past weekend that had us there 8am-8pm both Saturday and Sunday.  In all the fun and work, we forgot to do our meal plan and go grocery shopping!!!  Monday came and we had that YIKES moment!  Neither of us really has time to make it to the grocery store during the week days (although I'm thinking of skipping out on an event I'm supposed to be at tonight and make a trip to Earth Fare before bedtime...).  We've been eating from what little we have in our pantry, which has mostly been steal cut oats for breakfast with frozen blueberries and coconut milk, black beans and salsa mixed together over spinach for lunch, and frozen broccoli and black beans for dinner.  That's been our life the past three days.  I'm getting sick of it!  If you follow this blog you know I love my variety, so this has been torture!

I just finished my beans & salsa salad for lunch, and boy was I craving something sweet.  We have a roommate here in Charlotte, and she had offered us two avocados she'd had on her counter for over a week.  She said she didn't know what to do with them.  I told her I'd whip her up something tasty.  ;)  And I saw in the fridge she had a bag of limes.  Eureka!  So here is my after lunch sweet treat, which I was inspired to make from my signature and most favorite dessert recipe Raw Key Lime Pie.  This simple twist on my key lime pie recipe is quick, requires just a few ingredients, and tastes SO GOOD!

Key Lime Pudding
Makes 3 Servings

2 organic ripe avocados
1/2 tsp pure liquid stevia
3-4 Tbsp lime zest (yup, zest the whole bag of limes!)
2/3 cup fresh lime juice (and yup, squeeze almost all of them!)

Add all ingredients to your blender and blend on High until smooth.  Serve immediately or chill for an hour or two before serving.  I topped with crushed almonds to add a little protein and mimic pie crust.  DEEEElicious!

I went ahead and used standard limes that you'll find at your grocery store (Tahitian).  However, you can definitely go ahead and use Key limes if you have them or find them.  Key limes are naturally sweeter than Tahitian limes, so you can go a little less on the stevia.

Monday, March 28, 2011

Zucchini Bread (GUEST POST!)

This recipe comes from Patty Anderson and I hope you all enjoy it!!  I am a LOVER of zucchini bread and am excited for it to be coming into season again here shortly (at least down south where we're now living).  However, you can make this using frozen zucchini as well -- just be sure to thaw and allow to drain out the excess liquid for a few hours in a mesh strainer.  Now, on to Patty's sugar-free, grain-free, casein-free Zucchini Bread!

Patty's Zucchini Bread
Makes 1 loaf

2 1/2 cups almond flour, fine ground & sifted
1/2 cup coconut flour, sifted twice
1 tsp spoonable stevia powder
1/2 cup xylitol
1 tsp baking soda (all natural and aluminum free!)
2 tsp cinnamon
Pinch of sea salt
4 organic free-range eggs
2 tsp pure vanilla
1/2 cup coconut oil, melted
2 cups organic zucchini, finely grated (about 2 med/large zucchini)
Optional:  handful of chopped raw nuts

1).  Preheat oven to 350 degrees F.  Line a glass loaf pan with unbleached parchment paper and grease the sides with a teaspoon of coconut oil.  Mix almond flour, coconut flour, stevia powder, xylitol, baking soda, cinnamon and sea salt in a large bowl until well combined.

2).  In separate small bowl, lightly beat the eggs.  Stir in the vanilla, coconut oil and zucchini.

3.)  Make a well in the middle of your dry ingredients, then add the wet ingredients stirring well to combine.

4.)  Pour batter into prepared pan and bake for 50-60 minutes until light brown and a knife inserted into the center comes out clean.

Thanks Patty for the fabulous recipe!  If YOU have a great Maximized recipe you'd like to share, send it to me:  elise@healingcuisinebyelise.com.  Yours could be the next Guest Post!

Friday, March 18, 2011

Cocoa-Nut Bites

Okay, I can finally start sharing my favorite recipes that have gotten me thru some pretty intense pregnancy cravings.. I call these my Advanced Plan "Cocoa-Nut" Bites.  I've found certain flavors and foods from my childhood have been creeping back into my mind...  Grilled cheese sandwiches, Oreos, Reese's peanut butter cups...   These quick and easy little bites have filled my Reese's cravings a few times so far, getting me thru trimester 1!  And these are about 200 times healthier than a Reese's candy -- did you know they don't even use real peanuts in their peanut butter cups???  Their peanut butter is artificially created, loaded with sugar, and completely lacking protein.  When you're pregnant, protein is so so important, so I happily whip these treats up whenever the craving is upon me.  Protein packed and sugar free!  This recipe makes about 5-6 little bites, however you can easily double or triple to make more.  Would make great little treats for the kids or a party spread.  Hope you guys like them!

"Cocoa-Nut" Bites
Makes 5-6

2 Tbsp raw unsalted almond butter
1 Tbsp raw tahini
2 tsp organic cocoa powder
8-10 drops liquid stevia liquid (more/less to taste)
1 1/2 tsp pure vanilla extract
1/4 cup unsweetened shredded coconut
1 Tbsp organic raw hemp seeds
Pinch or two of sea salt

In a food processor, blend the almond butter, tahini, cocoa powder, stevia, and vanilla until a smooth paste forms.  Add the coconut flakes, hemp seeds and sea salt and pulse until just mixed.  Scoop the mixture out by teaspoonfuls and roll into balls.  (You may want to pop the mix in the fridge for 15 minutes if it's too warm to hold shape.)  Place formed Cocoa-Nut Bites on parchment-lined baking sheet and refrigerate or freeze about 20 minutes to firm.  Then, enjoy!

Sunday, March 6, 2011

Black Bean Confetti Salad

Salads, salads, salads... I've been eating so many lately and got myself into a rut!  Finding I'm wanting a week's break from spinach and kale.  So here is what I came up with for lunch today.  Thought it was very delicious, and although a salad, a great change from the usual greens!  But, you could even toss this with salad greens to make it more substantial!


Black Bean Confetti Salad
Makes 4 Servings

2 15-ounce cans organic black beans, drained and rinsed
4 organic bell peppers, a mix of colors, diced
1 organic cucumber, diced
1 organic jalapeno pepper, minced (optional)
1 white onion, diced
Juice of one large lime
3 Tbsp olive oil
1 clove garlic, pressed
1 tsp ground cumin
3/4 tsp sea salt
1/8 tsp cayenne
Handful of fresh cilantro, chopped (optional)
A few spoonfuls of organic Greek yogurt (optional)

Mix beans, bell peppers, cucumber, jalapeno, and onion in a large bowl.  In a separate, smaller bowl, whisk lime juice, olive oil, garlic, cumin, sea salt, cayenne and cilantro into a vinaigrette.  Pour vinaigrette over the bean mixture, toss well to coat, and adjust seasonings to taste.  Spoon into bowl and top with spoonful of Greek yogurt.

And that's what's for lunch today!

Monday, January 24, 2011

Kale Chips

This recipe comes by request from Nicole in Washington who wrote in on the Healing Cuisine Facebook page.  I am happy to share one of my most favorite and super easy snacks with you -- Kale Chips.  Great on their own as a snack or along side lunch.  They'll leave you wanting more!!  A truly healthy alternative to potato chips, kale chips (when left in their raw state) are a healthy carb rich in vitamins A, B, C, K and fiber.  Now, you will find other recipes out there suggesting that you bake your kale at 350 degrees or other high temperature.  What I urge you to realize is heating the kale at such high temps denatures the antioxidants and nutrients in the kale.  Also, if you're baking your kale until it's brown or black, those patches are carcinogenic and have been linked to causing disease in the body, namely cancer.

Kale chips gained their buzz first in the Raw community.  Research is further backing the benefits of eating a raw diet.  To keep a food truly raw, it should not be heated at more than 118 degrees F.  This preserves the enzymes in the food.  To achieve Raw Kale Chips (heated no higher than 118 degrees) you can use a dehydrator.  Unfortunately we don't yet own one...they're pricey little things, but I've got my eye on an Excalibur when we do have the funds.  Same with a VitaMix... haha.. well anyway, back to making kale chips.

I've had the pleasure of enjoying raw, dehydrated kale chips from a friend and it really takes them to a whole new level.  But if you don't have a dehydrator, I will also give you directions for your oven (at a low temperature to save some of the nutrients!).

Kale Chips
Makes About 6 Servings

2 bunches of kale, rinsed, shaken dry, destemmed and torn
1 Tbsp olive oil
Sea salt to taste
(This is my recipe for basic salted kale chips.  You can add any other flavorings you'd like!  Chili powder, cayenne, garlic powder, onion powder, vinegar, lemon juice...)

1.)  In a large bowl, add kale pieces and olive oil.  Get in it with your hands and massage the olive oil into every little nook and cranny of each leaf.  There should be barely enough oil to coat the leaves. They should not be soaked/dripping with oil.  If so, this is too much and you'll get soggy kale chips.

2.)  Spread your kale pieces evenly onto two dehydrator trays (or two baking sheets if using oven).  Sprinkle with sea salt and any other seasonings.

3.)  DEHYDRATOR:  Place trays into dehyrator and dehydrate at 115 degrees F for 6 hours.  Remove and enjoy!

4.)  OVEN:  Preheat oven to lowest possible temperature (most ovens this will be 200 degrees F).  Place baking sheets in oven and bake for about 2 hours then check for crispness. You may prefer to bake them a bit longer, but I like mine removed after 2 hours.

Dehydrated kale chips will stay crispy for about 3 to 4 days when stored in air tight container.  Oven kale chips should be consumed within a few hours as they'll get soggy in less than one day.  Hope you enjoy this easy and tasty snack!

Monday, January 17, 2011

Green Herbed Hummus

Dave and I are huge hummus fans.  We eat a quart of hummus just about every week.  Our top favorites are this recipe for Green Herbed Hummus, Roasted Garlic Hummus, and Roasted Red Pepper Hummus (the classics, right?).  We also rotate in Beet Hummus, Zucchini Hummus, and Broccoli Hummus when we need a break from the chickpeas.

Hummus is a great snack or component to a fabulous lunch!  Full of protein, good fats, antioxidants, it provides you with fuel! :)  We'll eat with zucchini and celery sticks or served over a bed of spinach.  Mmm mmm good!

Green Herbed Hummus
Makes About 2 cups

2 cups of organic chickpeas, rinsed and drained
2 garlic cloves
2 Tbsp raw almond butter
1/4 cup fresh parsley leaves
6 fresh basil leaves
1 organic scallion, chopped
1 Tbsp fresh dill
1-2 Tbsp fresh lemon juice
1/4 tsp cayenne pepper
1/4 tsp sea salt
1/3 cup olive oil

In a food processor or blender, add all ingredients except olive oil.  Pulse until slightly combined.  Run on High speed and stream in olive oil until combined.  Refrigerate 2 hours before serving to allow flavors to mix.

Friday, December 17, 2010

Chickpea Stuffed Cucumber Cups

At a party a while back (it was a cocktail party, I had to wear a dress, which I don't necessarily enjoy so to distract my mind from the uncomfortableness, I focused in on the food tables looking for ideas!), they had these little things I thought were hummus stuffed sushi.  I took a bite, but to my surprise they were hummus stuffed cucumbers!  What a delight!  So...here's my take on this cute little appetizer.  I've adapted this recipe from one in my not always so healthy for you Better Homes & Gardens cookbook for Asian inspired deviled eggs.  These make great snacks or appetizers for your own party!
Chickpea Stuffed Cucumber Cups
Makes 12

2 organic cucumbers
1 cup organic chickpeas, drained and rinsed
1 inch of fresh ginger root, finely grated
3 scallions, finely chopped
1 garlic clove, finely chopped
1 Tbsp Bragg's liquid aminos
a dash of hot sauce or cayenne pepper (optional)
1 Tbsp white miso paste OR Healing Cuisine Mayonnaise
Fresh black pepper to taste

1.)  Start by cleaning and slicing the cucumbers into 1 1/2 inch thick coins.  Hallow out the centers using a melon baller or small spoon, leaving a little at the bottom of the cucumber so the filling doesn't leak thru.

2.) Throw all the remaining ingredients into the food processor or blender and puree (including the scooped out cucumber seeds!).  When it’s mostly smooth, spoon (or use a piping bag) filling into the cucumber cups.  Refrigerate two hours before serving.  If you have leftovers, try it spooned over a salad or as a spread for a sandwich or wrap!

Experiment with flavors!!  ... curry?  mint?  roasted garlic?  You can also stuff with various salads (egg salad, salmon salad, chicken salad, black eyed pea salad...etc).  Another idea is using raw zucchini cups instead of cucumber.   So many possibilities!

Saturday, December 11, 2010

Peppermint Bark

Excited for 12 days of cookies?!  I am!  Most of the recipes I   L O V E   for Christmas are found in Season's Eatings holiday ebook & menu planner -- on SALE this month for $9.99!  I also have three new Advanced Plan creations for you: Peppermint Bark, "Candy Cane" Macaroons and...my most superlative dessert yet...Grasshopper Pie!

Today we're talking bark.  Peppermint bark is a Christmas classic.  Who can resist it?  Most commonly you'll see it sold in department stores and served at parties constructed of milk chocolate, white chocolate, and bits of minty candy canes.  What does that translate into?  Disease-causing sugar, food dyes, and more toxic sugar.  Well I've cleaned it up, per request of my friends Nicole and Mark, just in time for Christmas!  This delicious and super easy peppermint bark makes a wonderful treat or holiday gift.

Peppermint Bark

8 oz 73+% dark chocolate or baker's chocolate
5-10 drops pure liquid stevia (can also use naturally flavored peppermint stevia)
2 tsp peppermint extract

1.)  Line a 10x10 inch baking sheet with all natural waxed paper.  (If you only have larger sized baking sheets, double this recipe so you have enough chocolate to spread out across it.)

2.)  Melt the chocolate in a double boiler.  Add the liquid stevia (I used only 5 drops, as I don't like it too sweet...) and peppermint extract and mix well until smooth.  (Optional: Stir in chopped raw nuts -- I'm partial to raw almonds and raw hazelnuts.  Pistachios add a splash of Christmas color.  Maybe even some goji berries, or cranberries for Core Plan?)

3.)  Once melted, pour onto natural waxed paper and use a spatula to spread chocolate about 1/4 inch thick. (Optional: Sprinkle with crushed raw nuts, sea salt, dried fruits.)  Allow to cool and dry 6 hours or overnight.

4.)  Once dry, break chocolate apart into uneven chunks, store in airtight container until ready to serve.

Tuesday, December 7, 2010

Last Chance to Enter the Giveaway!!

Hi all,

Just a reminder to enter the Season's Eatings holiday e-book GIVEAWAY!  This is the last day you can enter.  Contest closes at 11:59pm CST tonight.  Be sure to check back here tomorrow at 9:00am CST to see the winner!  Good luck to all!

Here is a tasty smoothie recipe for these wintery days.  We enjoy for breakfast or an after dinner treat!  A great breakfast or snack to serve your holiday guests.

Apple Pie Smoothie
Makes 2 Servings (1 if you're really hungry :)

1 organic Granny Smith apple, cored and diced, frozen
1/2 of an organic cucumber, peeled and cut in chunks, frozen
Large handful of spinach or kale, frozen
1/2 of a large avocado
2 Tbsp raw pumpkin seeds, walnuts or pecans
1 Tbsp cinnamon (to taste)
1/2 tsp ground ginger
1/4 tsp ground nutmeg
1 tsp vanilla extract
10-15 drops pure liquid stevia
1 1/2 cups unsweetened organic vanilla almond milk
1 scoop vanilla or plain protein powder (Maximized Living Perfect Protein or Garden of Life Raw Meal are great options!)

Place all ingredients in blender and blend until smooth, stopping to stir and scrape sides as needed.  Consume immediately.  Who ever said you can't enjoy apple pie for breakfast?  :)

Now, don't forget to enter the giveaway!  It's easy, and you might win a free copy of Season's Eatings!

Thursday, October 28, 2010

Roasted Pumpkin Seeds - 3 Flavors

It's here!  Pumpkin season!!  Whether you're carving jack-o'-lanterns or making Pumpkin-Coconut Soup, Pumpkin Dip, Pumpkin Bread, Pumpkin Pudding, Pumpkin Bars or Pumpkin Pie, don't forget to save your seeds!  I know in my family, we'd cut open the top of the pumpkin and scoop out the pumpkin innards, seeds and all, into a black garbage bag, never to be seen again.  Well, for all those years we were throwing away some of nature's most nutritious seeds; the pumpkin seeds!

Pumpkin seeds are packed with a great supply of vitamins, minerals and healthy fatty acids.  Considered one of nature's nutritional powerhouses, just 1/4 cup provides a daily dose of phosphorous, magnesium, tryptophan, vitamin K, iron, copper, zinc and healthy fatty acids.  They are also a good protein and fiber source!

Pumpkin seeds can be eaten raw or roasted, shelled or intact.  Simply remove the seeds from the pumpkin, wipe them off and leave them to dry overnight on a baking sheet (I line mine with parchment paper to help absorb moisture).  Once dry, you can then choose whether to use them raw or to roast them.  To keep raw, simply store in an airtight container in the refrigerator for a month or two.  If you choose to roast (3 great recipes below!), remember we want to keep the center of the seed shy from heat to keep all of the nutrients intact.  Thus, we don't want to bake the seeds until they are brown -- this means they've had too much heat and the nutritional value has plummeted, in fact the fats are probably rancid and no longer good for us.  Instead, we want to bake at a low temperature for a short period of time to bake flavor in to the shell only.

And leave on your shells!  Pumpkin seeds with shells have more flavor and a crunchier texture than those without shells.  And the shells contain more fiber to keep your digestive system functioning properly.

Pumpkin seeds can be scattered on salads, used to make hummus, baked in bread or just munched as a snack food.  Some recipes call for "pepitas" which are hulled green pumpkin seeds.  If pepitas are what you prefer, learn how to shell your own seeds here.

On to the recipes!

Simple Salted Pumpkin Seeds

1 cup pumpkin seeds, cleaned and dried 24 hrs
2 tsp olive oil
1 tsp sea salt

Preheat oven to 300 degrees F.  In a medium bowl, mix seeds with olive oil and coat well.  Spread evenly on baking sheet.  Sprinkle with sea salt.  Bake for 15 minutes, stirring every 5 minutes.  Remove from oven, let cool on baking sheet.  Enjoy.

Curried Pumpkin Seeds

1 cup pumpkin seeds, cleaned and dried 24 hrs
1 free-range egg white
2 tsp curry powder
1/2 tsp sea salt

Preheat oven to 300 degrees F.  In a medium bowl, mix pumpkin seeds with all 3 ingredients.  Toss well to coat.  Using a strainer, drain off any excess egg white.  Spread evenly over a baking sheet.  Bake for 15 minutes, stirring every 5 minutes.  Remove from oven.  Carefully taste one seed -- it will be hot, let cool on a separate plate for a minute first.  Taste for seasoning, you  may prefer more curry or sea salt.  Add more to your taste.  Cool and enjoy.

Spiced Pumpkin Seeds

1 cup pumpkin seeds, cleaned and dried 24 hrs
1 Tbsp olive oil
1/2 tsp organic Tabasco sauce (more/less to taste)
1 Tbsp chili powder
1 tsp cayenne pepper
1/2 tsp cumin

Preheat oven to 300 degrees F.  In a medium bowl, mix pumpkin seeds with olive oil and Tabasco sauce.  Toss well to coat.  Spread evenly over a baking sheet.  In a small bowl, combine dried spices. Sprinkle spices over the pumpkin seeds.  Bake for 15 minutes, stirring every 5 minutes.  Remove from oven.  Sprinkle with sea salt to taste.  Cool and enjoy.

Have a happy Halloween everyone!

Sunday, October 24, 2010

Loaded Chocolate Protein Bars

My friend Laureen inspired me to melt down dark chocolate to create a rich protein bar when I tasted hers last weekend, which had the consistency of fudge!  I like mine a little crunchy, so I added ingredients.  My secret for that wow crunch?  Hempseeds.  Frozen hempseeds to be exact.  Store the bars in the freezer and you'll get an outstanding texture that stays together when you pick it up.  I've made these twice in the last week for Dave and me alone!  These make a great breakfast or snack!


Loaded Chocolate Protein Bars
Makes 24 Bars

3/4 cup coconut oil
3/4 cup 73+% dark chocolate chips / baker's chocolate
1 cup raw almond butter
2 cups raw almond flour
1 cup unsweetened coconut flakes
1/2 cup raw hempseeds
2 scoops protein powder (chocolate Nature Pro or Vega both taste great!)
1/3 cup unsweetened cocoa powder
1 Tbsp spoonable stevia
1/4 tsp sea salt

1.) In a medium sauce pan over Low heat, melt the coconut oil, dark chocolate and almond butter, stirring until smooth.

2.) Meanwhile, in food processor add in all remaining ingredients.  Pulse a few times to combine.

3.) Pour in melted chocolate sauce.  Pulse until well combined (you may need to stop and scrape down sides depending on size of food processor).  Mixture should be moist but not sticky or wet by appearance.  If it is too wet or oily, add in more almond flour and coconut flakes until proper consistency is achieved.  (I recommend tasting mixture for sweetness at this point, add more stevia if desired.)

4.) Spread mixture into a 9 x 13 inch baking dish lined with natural waxed paper.  Cover with waxed paper and freeze for 20 minutes until set.  Remove from freezer.  Holding the ends of the bottom sheet of waxed paper, pull straight up and the bars will come out of the pan.  Cut into uniform strips or squares using a pizza cutter.  Store in airtight container in fridge or long term storage in freezer.

Thursday, October 7, 2010

Chocolate Coco-Hazel-Nut Spread

I had a family approach me yesterday with questions about Nutella.  They recently started the Advanced Maximized Living Nutrition Plan and had purchased a jar of Nutella after watching a commercial claiming it is an all-natural spread perfect for breakfast.  In fact, their tag-line is: "Treat yourself with Nutella spread as part of a healthy, balanced breakfast."  Thankfully mom and dad read the label and knew to throw it out before feeding to the family.

Take a peek at the Nutella label.  Ingredients:  Sugar, modified palm oil, hazelnuts, cocoa, skim milk, reduced mineral whey (from milk), soy lecithin: an emulsifier, vanillan: an artificial flavor.

So, the hazelnuts and cocoa are great, but sugar and palm oil as the first two ingredients?  That volume of sweetness, the bad oil and processed dairy make this "all natural" spread a poor choice for any family at any meal.  Mom and dad asked me how can they replicate Nutella without the sugar, oil and milk?

Enjoy this raw chocolate hazelnut spread!  A truly healthy way to enjoy breakfast, snack, or dessert!


Chocolate Coco-Hazel-Nut Spread
Makes 1 1/2 cups

1 cup raw hazelnuts
Flesh of one young coconut
3 Tbsp unsweetened cocoa powder
Stevia to taste (I used about 1 tsp spoonable stevia)
Coconut water to perfect consistency

Add all ingredients to blender or food processor and blend on High until combined.  Stop and scrape down sides.  Slowly stream in coconut water while on Medium speed using just enough coconut water to get it to a spreadable smooth consistency.  Enjoy as is, with sliced Granny Smith apples or over sprouted bread!

Store leftovers in a jar in the fridge up to 1 week.

Related Posts with Thumbnails